Fry Sauce & Grits: DIY
Showing posts with label DIY. Show all posts

Wednesday, July 9, 2014

DIY Washi Tape Cactus Pot Gift and 101+ Birthday Gift Ideas!

Today is an exciting day.  I'm partnering up with 101+ talented bloggers for Kristen Duke from Capturing Joy Birthday Celebration Week to bring you 101+ inexpensive birthday gift ideas for your friends!  All week long, Kristen is sharing birthday tips and giveaways so be sure to check out her Party. Since I love plants, I'm sharing an easy way to spruce one up for a birthday gift idea!


Washi tape is so versatile, you can use it on so many things.  I got this pack of washi tape as a gift (how funny is that?) and thought it would fun to give this plastic terracotta pot that was holding the cactus a little makeover.

This was so easy and took me five minutes! All I did was cut strips of tape and applied it to the top and down the pot until the bottom.  Do this until the entire pot is covered.   

I'm not a way crafty person and I don't make printables, because I'm lame like that.  I had a card making kit from Stampin Up from their My Paper Pumpkin and cut out a square, added some stickers and punched a hole and tied some yarn to attach the gift tag to the pot.  And ta da, you're done!

  101 Birthday Ideas for Friends
{Blog Hop Birthday designs by C {dot} love}


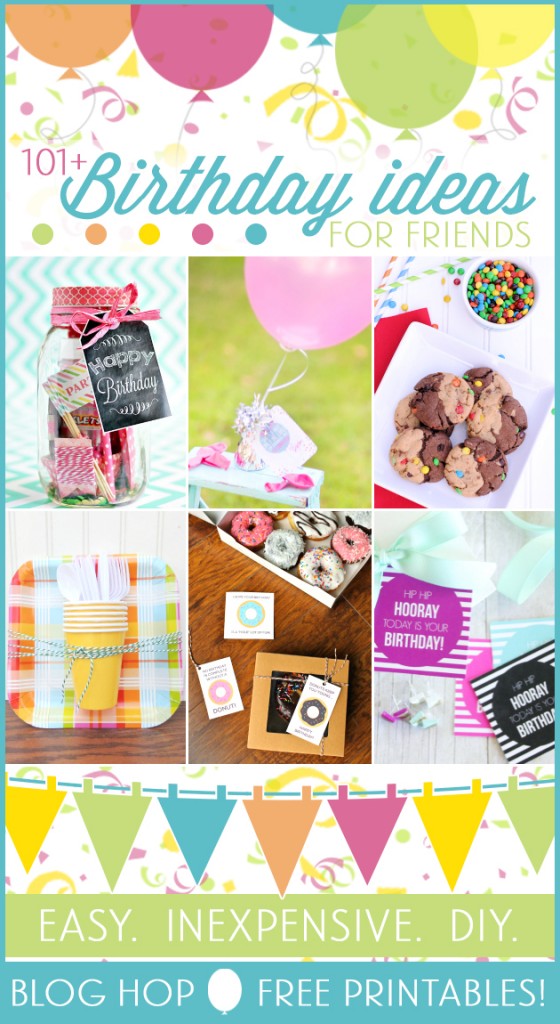
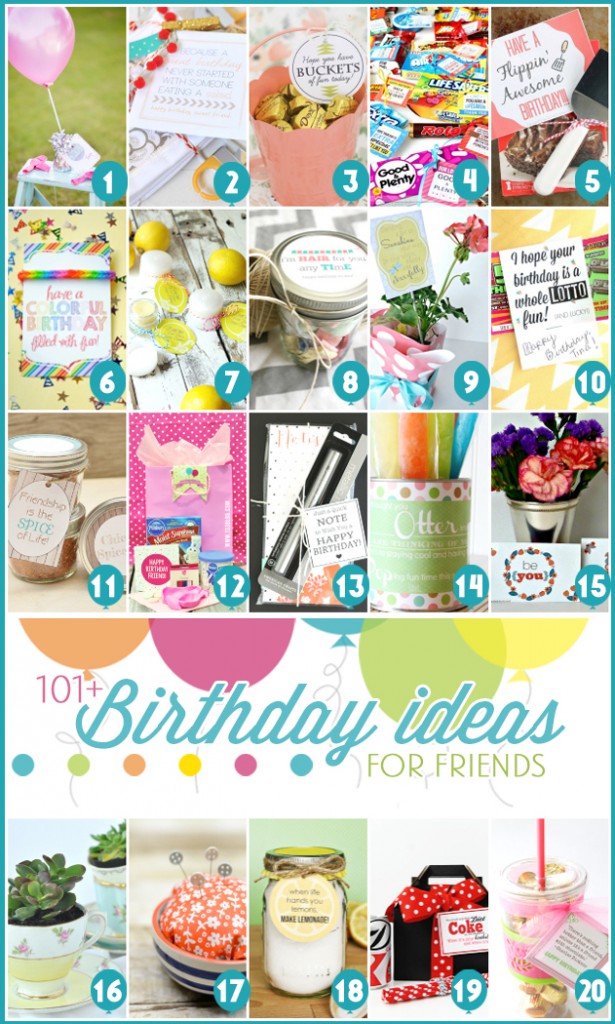
Are you ready for some inspiration? Join in on the BLOG HOP! Click on each of links below each collage to see the gift idea and printable closer, along with instructions on how to make them, like mine above. I like to open a bunch of new tabs, and Pin my favorites for later. Don't forget to follow the Birthday Gift Ideas Pinterest Board as well, to save future great ideas. 

 free printable blog hop 

1. Birthday Balloon Gift + matching free Print by Capturing Joy with Kristen Duke 
2. Stamped Cocktail Napkin + Printable by Delineate Your Dwelling 
3. Buckets of Fun gift idea+Free Printable by Craftiness is Not Optional 
4. 7 Candy Bar Love Notes to say "Happy Birthday" by The Dating Divas 
5. Have a Flippin' Awesome Birthday by Dessert Now Dinner Later 
6. Fishtail Loom Bracelet by I Should Be Mopping the Floor 
7. Lemonade Lip Balm by Pretty Handy Girl 
8. Hair Tie Birthday Gift & Printable Tag by Wait Til Your Father Gets Home 
9. Gift of Sunshine Idea + Free Printable by Sweet Charli 
10. I hope your birthday is a whole "lotto" fun by C.R.A.F.T. 
11. Chicken Spice Rub w/ Printable Tags by Over the Big Moon 
12. Birthday in a Bag Gift Idea by Seven Thirty Three 
13. Quick Note for your Birthday Printable by Liz on Call 
14. Otter Pop Gift with Printable Gift Tag by Somewhat Simple 
15. {you} Series Magnets Printable by Ruffles and Rain Boots 
16. Tea Cup Succulent by Your Homebased Mom 
17. Pretty Pincushion + Printable by Let's Eat Grandpa 
18. Lemon Bath Salts and Free Printable by See Vanessa Craft 
19. Diet Coke Birthday Kit by Pink Peppermint Prints 
20. Chocolate Filled Insulated Tumbler Gift by The Girl Who Ate Everything


  free printables blog hop 

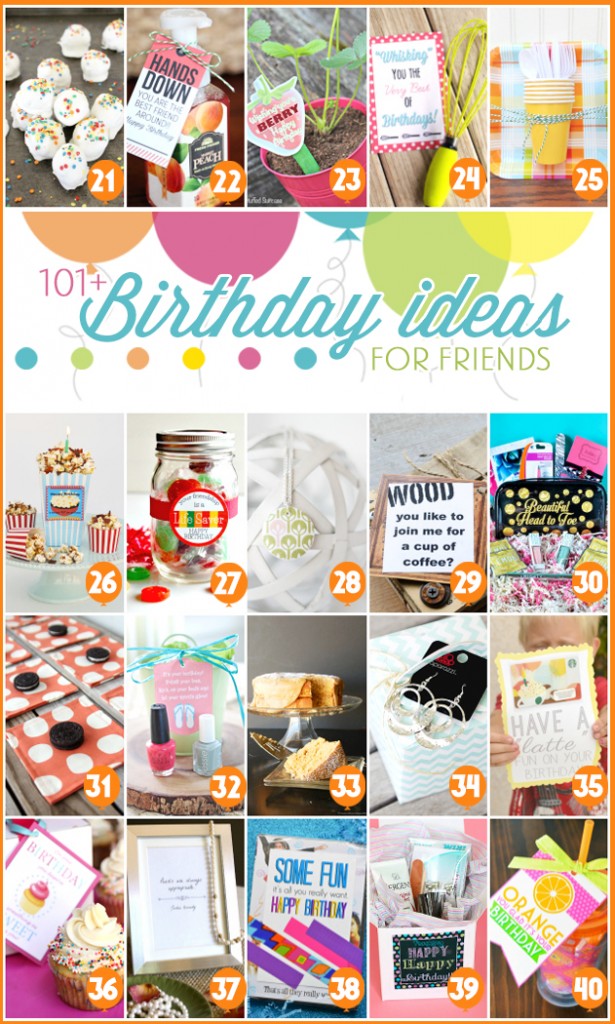
21. Easy Funfetti Cake Balls with Printable by Salt and Pepper Moms 

22. Hands Down Best Friend Around by Eighteen25 
23. Berry Happy Birthday Printable by Stuffed Suitcase 
24. Whisk Birthday Gift with Free Printable by Cupcake Diaries 
25. Paper Plate Gift Idea by Crafting in the Rain 
26. Popcorn Gift Printable by Breezy Bakes 
27. Life Saver: Birthday Gift in a Jar by Here Comes the Sun 
28. Decoupage Wooden Pendant by Twin Dragonfly Designs 
29. Have a coffee on me: Funky Coasters by Funky Junk Interiors 
30. Swanky Black & Gold Cosmetic Bag by A Prudent Life 
31. DIY cocktail napkins by kojodesigns 
32. Nail Polish Gift by Southern Hospitality 
33. Banana Cake by Whats Cooking with Ruthie 
34. Paparazzi - the PERFECT friend gift by Sugar Bee Crafts
35. "latte" fun birthday gift by Our Thrifty Ideas 
36. Homemade Funfetti Cupcakes + Printable by Tastes Better from Scratch 
37. Pearls are Always Appropriate by Mommy Envy 
38. Girls Just Want to Have Fun Birthday Gift by A Little Tipsy 
39. Manicure Kit Birthday Gift with Printable by Blooming Homestead 
40. Orange you Glad Cup by Artsy Fartsy Mama


  free printables 

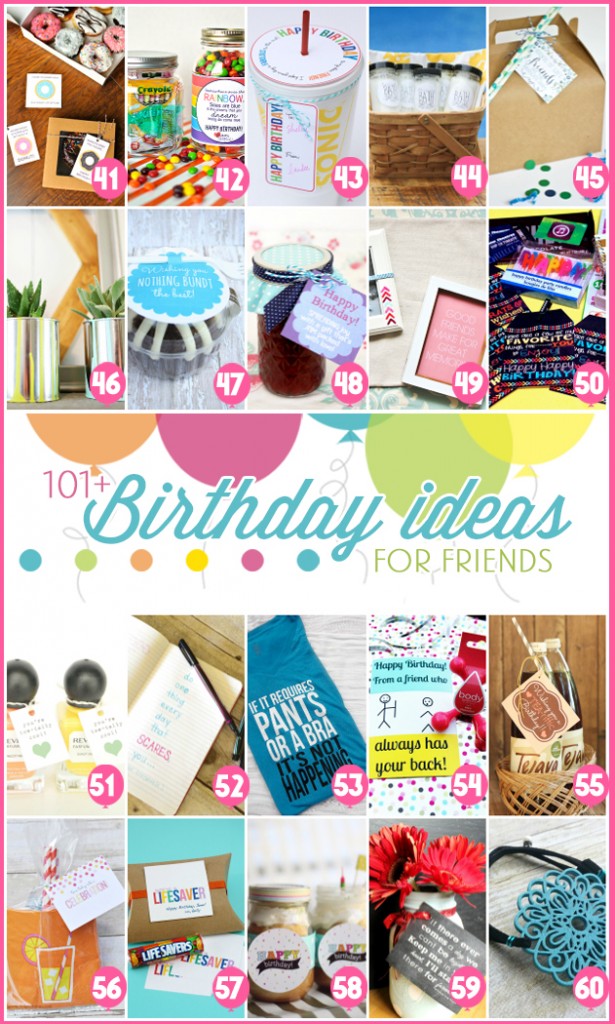
41. Donut Gift Tag by Pretty Providence 

42. Rainbow Inspired Birthday Gift + Printable by Thirty Handmade Days 
43. Drink Topper and Tag by LandeeLu 
44. DIY Bath Salts using Essential Oils by Unskinny Boppy 
45. Friends are Like Chocolate Chips by Delightful Deets 
46. Paint Can Succulent Planters by East Coast Creative 
47. A Bundt Cake Gift & Printable by Dukes and Duchesses 
48. Jam Birthday Gift & Printable by Happiness is Homemade 
49. Jazzed up Frames by House for Five 
50. Favorite Things Gift Ideas by inkhappi 
51. Toe-tally Cool Nail Polish Gift Idea + Free Printable by Simply Designing with Ashley 
52. Quote Book by Reasons to Skip the Housework 
53. Iron On T-Shirt Gift by Becoming Martha 
54. DIY Humorous Girlfriend Gift by Brassy Apple 
55. Tea-riffic Birthday Gift Idea & Printable by Mom Endeavors 
56. Turn Today Into A Celebration by Dolen Diaries 
57. You're A Lifesaver Printable by Live Laugh Rowe 
58. Happy Birthday Jar {free printable} by Kiki and Company 
59. Mason Jar Flower Vase + Printable by R & R Workshop 
60. Easy $5 Wooden Charm Bracelet by Craftily Ever After


  free printables 

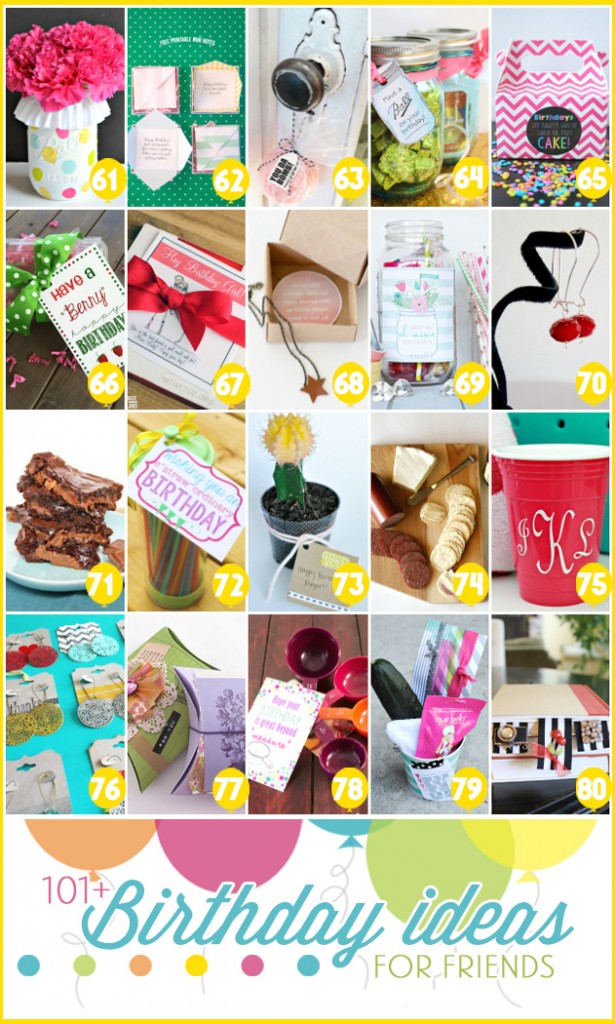
61. Polka Dot Mason Jar Vase by The Cards We Drew 

62. Free Printable Mini Notes by Confetti Sunshine 
63. Bath Bomb Easy Birthday Gifts by Tried and True 
64. Ball Jar Printable Tags by The Country Chic Cottage 
66. Have a "berry" happy birthday by The Contractor Chronicles 
69. Ah-Mason Birthday Gift Idea by Lolly Jane 
70. Simple Dangle Earring Tutorial by Bombshell Bling 
71. Symphony Bar Brownies by Among the Young 
72. Wishing you an E "straw" diary Birthday by Ginger Snap Crafts 
73. DIY Washi Tape Cacti by Fry Sauce and Grits 
74. State Pride Cheese Board by Addicted to DIY 
75. Reusable Monogrammed Solo Cup by Mom 4 Real 
76. go-to gift…EARRINGS! by A Girl and A Glue Gun 
77. Embroidered Mixed Media Bookmarkers by The Creative Goddess 
78. Beyond Measure Birthday Printable by Like Mother Like Daughter 
79. Birthday Facial Kit Gift by The Benson Street 
80. DIY Jewelry Bookmark by Design Dazzle


  blog hop free printables 

81. Birthday in a Jar - Birthday Printable Tags by A Pumpkin and a Princess 
82. Chocolate Peanut Butter Swirl Party Cookies by Crazy Little Projects 
83. You are the Bee's Knees by Love the Day 
84. Birthday Candy Jar by Inside BruCrew Life 
86. Treat Yo Self Printable by Girl Loves Glam 
88. Happy Birthday Sweets by A Night Owl 
89. Quick & Easy Hydrangea Cake by Sweet C's Designs 
90. Sweets for the Sweet by Simply Kierste 
91. Citrus Whipped Honey Butter Jars by Sand and Sisal 
92. Diet Coke Gift for a Friend with Printable by Sweet Treats and More 
93. A Latte for Two + printables by One Krieger Chick 
94. Cookie Monster Birthday Gift Tag by I'm Topsy Turvy 
95. Root Beer Float Cake in a Jar by Giggles Galore 
97. Fruity Body Scrub with Printable by Mad in Crafts 
98. Magnetic Necklace Charm by Sowdering About 
99. Happy Bee Day with Printable by Just Another Day in Paradise 
100. Manicure in a Jar by That's What {Che} Said... 
101. UBER lucky to have you in my Life by Maybe I Will 
102. Free Happy Birthday Printable by NoBiggie 
103. DIY Wine Bag & Charms Gift by Sypsie Designs 
104. Crispy Crunch-y Pie with Printable by Just Rhonda 
106. Tie One On for Your Birthday (Hair Tie Gift Free Printable) by illistyle

Did you have a gift idea that stuck out to you? Go ahead and visit your favorites and let them know you love it!

Follow the Pinterest Gift Board now!

Thursday, April 10, 2014

China Cabinet Makeover with Miss Mustard Seed Milk Paint

Oak China Cabinet Redo from Fry Sauce and Grits

This post has been a long time coming.  After all of the Christmas festivities, I made it a goal for the New Year to paint this 80's looking oak china cabinet we've had in our living room for the past three years.  It was time for a much needed paint makeover.  I didn't want to do a latex paint and have it look really glossy.  I wanted it to look like I spent a lot of money on it and wanted to make a statement with this piece.  This china cabinet has some really good bones, is made from solid wood, and has really beautiful antique brass glass leaded windows and shelves.  After some research I came across this stuff called milk paint.  Milk paint is normally known for having that chippy look, I knew I didn't want the chippy look on this china cabinet. I saw pictures of milk paint where it was smooth, not chippy, and it looked gorgeous.  So that's when I decided to use Miss Mustard Seed's Milk Paint to do the job. 

Sunday, January 19, 2014

Link Up Loves #4

Hey everyone!  I hope you're having a fabulous weekend!  I was really excited about this week's link ups because they're all so different!  Here's what I'm crushing on this week!


This article from Simtten By was just what I've needed to read to help me with something I've struggled with for a long time, to celebrate the success of others.  Sometimes I get down or feel insecure when I see other succeed.  This is a great reminder that by thinking that way only hurts yourself.  


I love this rain cloud mobile from Root and Blossom!  This would make the perfect baby shower gift or just that craft itch you've been feeling for a while! 


Don't you wish your front door looked this cheerful during the gloomy winter months?  I love this look from Delineate Your Dwelling!


This DIY Sunburst Mirror is a stroke of genius from Bigger Than the Three of Us!  She uses some old blinds to make the bursts!  


Oh my gosh, don't you love this dress from A Lifetime of Rain?  I sometimes get in a black and frumpy mess during the winter.  This dress is just what I want to spice up my winter wardrobe! 

Follow on Bloglovin

Monday, December 16, 2013

DIY Velveteen Bow Tree Topper Tutorial

Our tree has been decorated for a couple weeks now and I haven't put a tree topper on it yet because I don't have one.  I didn't want to spend any money so I did the best thing I could do was to diy own!  I saw this Christmas tree from the talented Kristen from The Hunted Interior and loved everything about it.  I've had this picture in my mind for a while now and thought of how I could incorporate this into my Christmas tree.  A couple nights ago at 10 p.m. when I getting ready for bed, I thought a big velvet bow would be the perfect touch to our Christmas tree.  With this simple and easy tutorial you'll be able to create this stylish tree topper bow for your sophisticated looking tree, wreath, garland, or make lots of bows to scatter them throughout your Christmas decor.  I love how it turned out!

Velveteen Bow Tree Topper from Fry Sauce and Grits

Tuesday, December 3, 2013

DIY Bakers Twine and Bell Garland


DIY Bell Christmas Garland Decor from Fry Sauce and Grits

Hey everyone, it's Courtney.  I want to share with you one of the easiest, cheapest, and quick "crafts" I've done all year.  Do you have some bells laying around the house?  Why not turn those bells into a fun and festive garland for your mantel, doorway, tree, or wreath.  This little decoration has added so much character to my mantel.  Check out how I made my DIY Christmas Bell Garland!
  

Monday, November 25, 2013

Holiday Gift Idea: DIY Genealogy Fan Wall Art

Getting a gift for parents, grandparents, or any loved ones for birthdays, anniversaries, and for the holidays can be really hard.  You want to give them a priceless gift that is something they're going to cherish and not throw away in six month, right?   I have the perfect and priceless gift idea for your loved one.  How about giving the gift of family by creating your very own stylish genealogy chart or fan where you can display, proudly, your family and heritage!


DIY Genealogy Fan Wall Art Gift Idea from FrySauceandGrits.com

Wednesday, November 6, 2013

DIY Painted and Gold Dipped End Table Makeover

I've made it my mission to decorate my living room on a TIGHT budget.  We've lived in our home almost three years and I'm finally getting around to getting to this much neglected space.  I'm making slow progress.  I added a new little piece of furniture, a small accent table.  This console table was a $3 D.I. find and knew that this small table would be a great addition next to my sofa or an antique chair.  With a little DIY, work, patience, and a lot of coats of primer and paint, I was able to turn this little end table from sad to rad!

Painted Console Table Makeover from FrySauceandGrits.com

Thursday, October 31, 2013

"Easy" and "No sew" Gold Polka Dot Burlap Curtains

Sometimes I really enjoy doing DIY projects.  Sometimes I don't.  This is was certainly the latter.  After I made what felt like a million different trips to JoAnns and Michaels and spent two of my days off working on these curtains, I had second thoughts about this project.  At that point I was thinking I should have just ordered those curtains I found online because this is taking way too much of my time and energy!

But, alas, I pressed on.  And I made some dang curtains!  Please learn from my mistakes if you attempt these.

Easy Burlap Curtains

Thursday, October 24, 2013

How to Paint a Glazed Ceramic Lamp Tutorial


I bought this lamp at Target over a year ago for $10 on clearance. I liked the shape and color, but I didn't really know where in my house the deep plum color would work.  And my husband vetoed it in the bedroom because he doesn't like it.  So, it sat in a closet in the guest room.  It turns out you can spray paint over glazed ceramic, and it's pretty simple too.  You just have to follow these steps...


Tuesday, October 15, 2013

DIY Leather Baby Moccasins

A couple weeks ago I was cleaning out my closet and came across an old reddish orange suede skirt I used to wear in high school.  I kept onto this skirt for so long because it's such a classic piece and had a hard time getting rid of it.  I couldn't remember the last time I wore it and tried it on.  I wasn't surprised that it didn't fit.  I was thinking of all of the things I could do with the skirt.  Make a pillow, leather bows for Amelia, and then it came to me!  I could make Amelia some suede moccasins.  Check out how they turned out!

DIY Leather Baby Moccasins from FrySauceandGrits.com


Sunday, September 1, 2013

Monday, August 12, 2013

DIY Painted Frame Mat


DIY Painted Frame Mat from FrySauceandGrits.com

One obsession I have is art. I don't know why I have this desire, but I think it would be so awesome to own pieces of original art in my home.  Of course, I don't have the budget to do so, so to make due, I use what I have and try to update them to make them look awesome.


Monday, July 22, 2013

Celctic Knot Inspiration

I have a new obsession this summer.  I'm in love with Celtic knots!   I used to think this art form was only worn and loved by Lord of the Rings and medieval fanatics you find at the park sword fighting each other. I've changed my mind about that and this ancient insular art form is my go to for this summer and fall.  

What started this obsession was when I received two Celtic Knot Turbans from Very Jane one in black and coral.  I wear them almost every day!  I wear them to church, hanging out with my girlfriends, when I'm home all day, and I even wore them while camping (made me feel classy when I had dirt embedded in my nails).

Celtic Knot Headband from FrySauceandGrits.com

Friday, July 12, 2013

Ottoman Reupholster Makeover


Ottoman Upholstery Makeover from FrySauceandGrits.com

 Having a blog has help me complete projects I've put on the back burner.  In March of this year I was at my local Deseret Industries causally shopping with my friend when I came upon these two forest green ottomans.  They were N-A-S-T-Y!  They smelled and had cat hair all over them.  I really liked the shape of them and how simple they were.  I thought, this would be a really great replacement for the Duncan Phyfe coffee table I already have in my living room because I wanted a more eclectic living room.  I could also use them for seating if we needed more seats in our living room!  They had function and style!  So I bought the two ottomans for $20 and put them in my garage for the time being.  

Four months later I was sick and tired of running into them whenever I would pull my car into the garage, they were taking up valuable real estate, and our living room is in desperate need of some decor.  This week I tackled the challenge of reupholstering my first pieces of furniture.  It wasn't too bad.  It took me all day, literally.  My mother-in-law was so kind to drive a hour to spend the entire day with Amelia so I could focus on this project and get it done!  Thanks Ann, I owe you one!  

This is what the two ottomans looked like before.


Drum roll.....  Here is what they look like now!   


 The first thing I did was cleaned off the nasty cat hair that was embedded into the fabric.  I carefully pulled apart the fabric by taking out each of the staples (long and tedious).  I did this by using an ice pick tool my husband had in his tool box and some dyke cutter to pull out any broken pieces of staples.  Remember to wear a pair of handy dandy leather gloves (these are a must!).  I tried to be as careful when taking apart the fabric because I needed it to be intact so I could trace the pattern.  Underneath the fabric was some cotton batting, I decided to keep it on instead of replacing it because it was in good condition and I didn't want to spend the extra money.  I purchased my chartreuse yellow fabric from Home Fabrics for $7 a yard!  What a screaming deal.  


To assemble the ottoman I had to sew two pieces of fabric that wrapped around the sides and then sew the top to it.  After I was done sewing the fabric, I slide it over the ottoman, then started to staple the fabric to the ottoman.  Make sure everything is taut before you staple and take your time with this. 

The trickiest part was installing the tack strips to the inner sides of the ottoman.  You wrap the fabric around the tack strip and then once in place hammer it in.  This is harder when you're a lone ranger likes I was, but it can be done.  Just be patient.  The first one I installed, one of the nails got bent, and it was being a stickler by  not going into the wood.  I cut out the nail and hot glued it to the fabric.  Having a hot glue gun on hand is really important when you reupholster anything.  

After I installed the tack strips to both sides, I started to nail the brass nail stud strips.  By purchasing the nail strips, you only have to hammer in a nail every five studs. Therefore making the process a lot easier then hammering each nail head.  I nailed the bottom portion of the ottoman because I liked the look of it the best.  And that's pretty much it!  It took me all day to complete one ottoman.  That's including getting distracted many times, watching glimpses of Kitchen Nightmares, going potty, getting hydrated, and fueling up on snacks.  

Supplies: 
two nasty ottomans 
2.5 yards of yellow chartreuse upholstery fabric 
two packages of brass nail stud trim 
stapler 
nails 
leather gloves 
ice pick tool or flat head screw driver to get staples out of wood
dyke tool to take out the broken pieces of staples

Wednesday, July 10, 2013

Ain't Nobody Got Time for That!


aint noboby got time for that


Sometimes, as I am perusing the pages of Pinterest, I am inspired.  Sometimes, I am left thinking--REALLY?!  Some people are taking the DIY craze to the next level.  I love a good fun project or craft as much as the next girl, but I just have to rant for a minute here.

 Who has time to make their own homemade bite-sized Goldfish crackers?!  Especially at the rate I have seen some toddlers consume them.  I mean, come on now people!  I guess I would just be happy if I could make a homemade healthy dinner every night.  Maybe if I didn't work full time, and freelance, and try to blog, and didn't go to church.  Then my family would have some fresh cheese crackers at all times.  Yes, they would.


Or spend all night doing intricate nail designs that require taping the nails off and letting them dry for hours in between.  And, anyone who knows me, knows I AM A FAN of painting my nails.


And, can someone please explain to me, why making your makeup remover wipes out of paper towels is a good idea?  Especially after reading they can become moldy within days?  Gross!


For these people, I have a few words for you.  Target.  Neutrogena.  $4.99.


With all that being said, who am I to judge if one particularly intricate activity is worth ones time, more then the next?  And, this is coming from the girl that watches The Bachelorette weekly--a guilty pleasure of wasted time.

So, if you have tried any of these, or any other type of DIY project, and want to let me know why it was totally worth your time, I would love to hear about it!


Friday, June 28, 2013

Chalkboard Folding Chair Makeover from Girl Loves Glam

Hey Frysauce and Grits readers! I am McKenzie from Girl Loves Glam and I can't even tell you how pumped I am to be here today! Courtney is one of my all time favorite people. I love Fry Sauce and Grits because it is just as fabulous as she is!

Girl Loves Glam with text

Today, I am sharing a really simple tutorial to help you take your boring old folding chairs from drab to totally fab!

Chalkboard Folding Chair Makeover on www.girllovesglam.com! Never use a place card again! Write everyone's names on the chair they are sitting on! #diy #tutorial

What a better way to makeover a folding chair than to paint it a bright, fun color, right? Well, there is a better way! Adding a little chalkboard paint to it takes it one step further into awesome town. Here's what you need to make your own...
*Folding Chair
*Spray paint
*Clear Chalkboard Coating Paint
*Chalk

Spray painted folding chair

First, spray paint your chair whatever color you want it to be. It might take 2 coats depending on how dark the color is. Be sure it is a paint that can be used on metal.

Clear Chalkboard Coating Paint

Now for the good part! Paint the Clear Chalkboard Coating paint on the backrest part of the chair. Paint the front and the back of the chair. Be sure to follow the directions on the bottle. Paint 3-4 coats of this on, waiting an hour between each coat.

Chalkboard Backed Chair that can be used as a way to let people know where to sit.

After the paint has cured, you can write on it just like a chalkboard! You can use it to write people's names on it to mark their spots for a BBQ or a party!

Chair with chalkboard back

You can write the name on both sides of the chair so that their spots are easy to find too!

Chalkboard backed folding chair

When you aren't entertaining guests, you can draw fun designs on your chairs to bring more color and design to your decor! Aren't they so fun? I am going to be looking for more chairs at garage sales to add to my chalkboard folding chair collection!

Thanks so much for having me guest post today Fry Sauce and Grits girls! Be sure to come visit me on Facebook, Twitter, Pinterest, or on www.girllovesglam.com. You might like these posts too...

Dining Set Makeover
Enclosed Porch Makeover
stenciled frame

Wednesday, June 19, 2013

Six Easy Embellished Onesie Designs

6 DIY Embellished Baby Onesies from FrySauceandGrits.com
One morning a while back, I was doing my daily morning routine of getting Amelia and I ready.  As I was going through her closet to decide what she was going to wear that day, I started to feel that I had nothing for her to wear (I feel this way all the time in my closet).  She had plenty of clothes to choose from but I was feeling bored of them.  I had received a handful of onesies as baby shower gifts and even though onesies are practical and great to dress your baby in, they can be boring and downright ugly.  I hated how most of the onesies I owned had stupid stitched characters like monkeys and bears on them.  I didn't want to go spend extra money on clothes for her.  So a light bulb went off in my head.  I thought to myself, "Why don't I embellish and cover up the ugly parts of the onesies to make them cute!" 

 To start, I looked for inspiration. I got online and checked out some of my favorite stores that I can't afford (Anthropologie, J Crew, Nordstrom) and then my last stop is the mother load of inspiration, Pinterest.   This helped the creative juices flow.  Whenever I start a new project, I always scavenge the house to see what supplies I already have so I don't have to spend extra money.  I had a bag of old clothes I was going to donate to the Salvation Army, and I decided to take one extra look through them to make sure there wasn't items I wanted to keep.  To my surprise I found a couple of items that had some amazing textures and patterns on it and thought they would look awesome on Amelia's onesies.

Blue Lace Bow Onesie

DIY Bow Baby Onesie from FrySauceandGrits.com

This onesie is one of my favorites because of the fabric I used on it.  Get this, I had some old lingerie that had seen better days (wink, wink) and it was made from this blue stretch lace.  I loved the texture and color of the lace, so that's when I decided I would make a big bow in the front of the onesie to cover up the, "Daddy's little girl" wording in the center. To make this onesie I first cut two six inch strips out of the cups (the bust part of the lingerie top) pinned them to the edge of the sleeve and sewn over it.  Easy.  For the bow I took the midsection (make sure you have both seams on the sides intact to make it easier) of the lingerie top and folded it back and forth like an accordion.  I squished the middle and tied some thread around it to keep it secure.  I used a cream and gold stripped piece of fabric from an old dress and hot glued it around the middle to make the bow.  To attach the bow I pinned it in the center of the onesie to cover up the words.   Then took some matching thread and hand sewn the outline of the bow to the onesie.   

Cream Doily Onesie

Lace Doily Baby Onesie from FrySauceandGrits.com

My great-great-grandmother was known for her lace and crochet work.  I actually own a couple of pieces in my home and WOW, what a piece of art they are!  Well I didn't want to use one of old granny's antique doilies so I went to Joann's and purchased this cream one for .99 cents!  I cut a circle out of cream fabric that I already had, put the doily on top of the fabric, pinned both the fabric and doily it to the center of the onesie (to cover up the not so cute looking flowers), used my sewing machine with cream thread and sewn a small circle in the middle and a large circle towards the edge to secure it to the onesie.  To make this even more unique, add some color or textured fabric behind the doily! 

Lace Bib Onesie

Lace Baby Onesie from FrySauceandGrits.com

To make a this Lace Bib Onesie, I took an old brown lace shirt and cut two six inch strips from the lacy trim (there was two different type of trims on this shirt).  I cut a 12 inch piece of that cream and gold stripped fabric I had from an old dress.  On the cream and gold fabric, I sewn a long length stitch at the top of the fabric and then ruched the fabric to make it look gathered.  I layered each layer on top of each other to give it a waterfall effect.  I pinned them to the onesie and sewn across each layer at the top.   

Green Flower Onesie

DIY Fabric Baby Onesie from FrySauceandGrits.com

I got the inspiration for this Green Flower Onesie from a very expensive Anthropologie shirt I saw a couple months back (I still wish to this day I would have gotten it).  This was one of the easiest onesies to make.  I used an old green ribbed tank top as the fabric for my flowers because I knew it wasn't going to fray.  To make the flowers I free handed it and cut out different sizes of flowers: large, medium and small.  The less perfect, the better. I then layered them on top of each other (2 flowers per flower) and arranged them in a random sequence on the onesie.  I pinned them to the onesie and hand sewn them on with matching green thread.  To get a "curling" effect, just sew the flower petals to the onesie.  Learn how to make Amelia's bow headband here.

Victorian Cameo Onesie

Victorian Cameo Onesie from FrySauceandGrits.com

I always loved the look of Victorian Cameos.  My grandma had a cameo pin she would wear all the time, this onesie reminds me of her and how classy she is.  To make the cameo, I used two different colors of felt  for the oval and for the lady.  Draw a medium size oval on one color of felt and cut it out.  For the cameo, I looked at cameos on the internet and hand draw it onto a different colored felt and cut it out. Super glue the lady to the center of the oval.  For the lace fringe behind the oval, I used up more fringe from that lace brown shirt I used in the Lace Bib Onesie.  I cut out a 12 inch section of lace and hot glued it to the back of the oval.  For the cute cheetah print bow, I used an earring who had lost it's mate, so I ripped the bow off the earring and hot glued it to the lady.  Once I was done with all that, I made sure the cameo was centered onto the onesie, and hot glued the entire cameo on the shirt.  For the fringe on the sleeves, I took two six inch strips of lace fringe from the brown lace shirt I used in the Lace Bib Onesie, pinned it to the the edge of the sleeve, and sewn it on there.  BTW, the cute headband Amelia is wearing is from Cozette Couture.  

Draped Metallic Bib Onesie

DIY Bibb Baby Onesie from FrySauceandGrits.com

This white onesie was almost thrown out a couple times.  When I had Amelia I thought I knew how to do laundry and get rid of stains, well let's just say a lot of Amelia's clothes were ruined because I was so ignorant when it came to getting formula, poop, and other bodily fluid stains out of her clothes.  FYI, I've gotten a lot better with getting stains out of clothes.  This onesie had disgusting yellow stains all over the front.  Amelia looked pretty ghetto whenever she wore this poor onesie.  I got the idea to drape the stains with a piece of an old metallic shirt I used to wear.  I cut out a 6" X 12" rectangle piece out of this metallic shirt.  I used my sewing machine to sew a long length stitch at the top of it.  To get the gathered look, I then ruched it, pinned it to the onesie, and sewn over it!  Now no one know there's nasty stains because they're hiding behind the bib.  

I hope you enjoyed reading how I designed these onesies.  I feel that having a stylish baby doesn't have to come at a premium price, it just takes some extra time and some creativity.  Hopefully this has inspired you to create new things out of old things. 

I was featured on My Craft Channel where I demonstrated how I created the onesies. Check out the video here!

Also, check out my Studio 5 debut below! 

Related Posts Plugin for WordPress, Blogger...