Fry Sauce & Grits: Baby
Showing posts with label Baby. Show all posts

Wednesday, June 25, 2014

Amelia and a Freshly Picked Moccasin Giveaway

Amelia turns two in a couple weeks and I can't believe she's so grown up.  This little girl has grown up to be a brave, sweet, funny, silly, friendly, and vivacious little girl.  Sometimes I can't stop just staring at her where I get to enjoy her little expressions, the mumble jumble of words she says, and how she interacts with the things around her.     

For the longest time I've really wanted a pair of Freshly Picked Moccasins.  It's one of those things you wish your Mom, a friend, or your rich Aunt would buy you a pair for a birthday or Christmas gift.  Well, I waited and waited and never got a pair.  I know, I should of have saved my money and bought a pair, but sometimes buying food and paying the bills comes first, you know?  

Well, I'm happy to say I finally got a pair.  Thanks to Freshly Picked, of course!  When I got these in the mail, it was an experience.  The cute little muslin bag, the scent of fresh leather, and loved how soft they are to the touch.  Because I loved them so much, I had a hard time having her wear them because I didn't want her to get them dirty or scuffed!

I realize that they're shoes and they're made to be worn.  So I thought it be fun to do a mini photo shoot of Amelia in her cute Neon Pink Moccs.


Wednesday, June 4, 2014

Art Nouveau and Eclectic Nursery

Amelia is turning two in a couple months and I cannot believe I've never posted pictures of her nursery. Yeah, I'm pretty lame.  Recently I've added some new touches to the room and wanted to share them with y'all.

Some history behind her nursery.  The week I found out I was pregnant, I started to design two different nurseries, one for a boy and for a girl.  When we found out Amelia was a girl, I knew instantly what I wanted to do for her room.  I really love the Art Nouveau period of the late 1800's and early 1900's.  It's mixes nature and modernism and it was one of my favorite periods to study when I was studying interior design classes in college.

I have an antique copy of this book called Mother Earth's Children The Frolics of the Fruits and Vegetables and loved it as a child.  I really wanted to incorporate this book into her nursery decor.  This is one of my favorite illustrations from the book. 

Monday, March 10, 2014

What's in my bag?: New mommy edition

Call me a creep, but I love to see what other women keep in their handbags.  It is super interesting to me, and I think it can tell you a lot about a person.

You've probably seen those edited articles in magazines of what celebrities carry in their handbags, everything looks polished and pretty. Well, I wanted to share what I consider my essentials because as a new mom, I carry a lot less makeup and random things, and a lot more baby gear!


So, this is what I actually have in my handbag right now--my essentials.

Monday, March 3, 2014

On Becoming a Mommy

Scarlett Cay joined our family here on earth December 15, 2013 at 3:26 AM.


7 lbs 2 oz
21 inches long
Alert as ever
Likes to stick out her tongue
Has a heart-wrenching "sad lip"
Blue eyes

Ambiguous hair (dark brown on top, red on the sides, strawberry blonde eyebrows) We're still trying to figure out her hair.  It seems to be coming back in blonde, but who knows?  Her hair has been quite the subject of intrigue from both sides of the family.  Grandmas want red-headed grandchildren I guess.

Our first family photo
Let me start by saying I would like to apologize to my own mother for ever being sassy or bratty at any point in my life.  I now have a 10 week glimpse at being a mom, and--wow.

Something about becoming a mom has made me reflect a lot on my own mother and father.  It's a strange and humbling feeling.  I can't entirely put it into words, but I guess I now understand them more, and I feel selfish for not realizing sooner all they have done for me.  I've always been thankful to my parents, but now I can say I'm starting to understand just how thankful I should be.  It's not easy to care for a baby 24/7.  And I have only been at this new job 10 weeks.  It has also made me understand love in a way I never knew I could.  I feel closer to my Savior and I am so blessed he trusted me with such a sweet spirit. I will eternally be grateful for my precious baby.


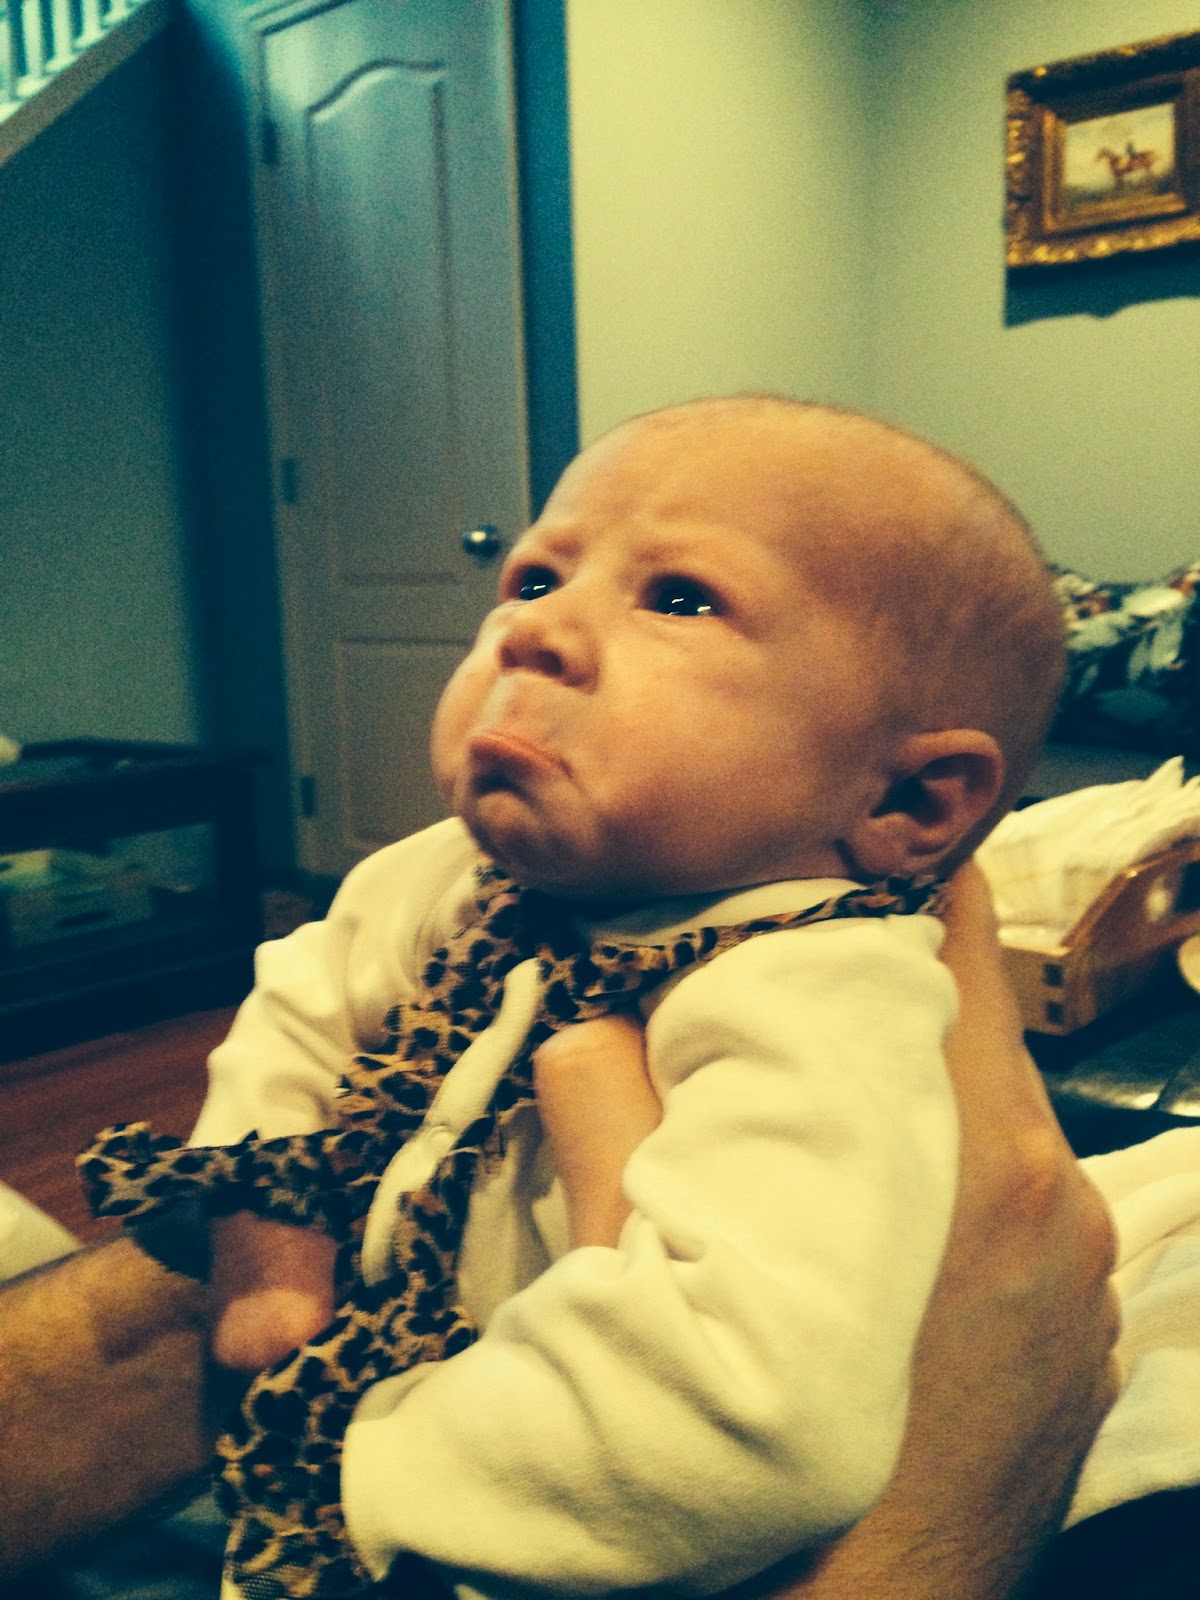
The famous "Sad Lip"
I've thought through all the cliched things people tell you about having a baby:

"They grow so fast."
"Say goodbye to sleep!"
"Nothing can prepare you."

But, I can honestly say I had no idea how high the highs would be, and how hard I would feel the lows those first few weeks.  My body was raging with happiness one moment, and the next I could barely focus my thoughts in a sleep-deprived haze.  Scarlett didn't sleep longer than a couple of hours the first 3 weeks.  She would cry whenever you put her down or stopped moving her.  There were nights when Andrew and I took turns pacing the floors to calm her down.  She lost a pound from her birth weight, and I was desperately trying to breastfeed and recover from an unplanned Cesarean section.  Night after night she would cry after I put her down, and I would cry too as I struggled to get back out of bed and not pull on my incision.

After several visits with the doctor, I finally gave in to supplementing my breast feeding with formula.  He told me, "Melanie, formula is not the devil."  And you know what?  He was right.  I wanted to be able to exclusively breast feed, but my baby at 3 weeks weighed almost a pound less than her birth weight. The first night we offered her formula after breast feeding, she was a changed girl.  She relaxed, her body loosened, and she slept.  My poor baby must have been hungry for 3 weeks.  Hangry!

This brings me to why I think birth plans are BULL.  You hear all this junk about how you need to have a plan, and there is a checklist of things you need to "decide" before that day. BULL crap.

Yes, of course it's good to have an idea in your head of how your ideal birth would go.  But, does anyone's experience ever go exactly as they planned?  I wanted a vaginal birth.  But after 24 hours of labor, and pushing, and then "No, stop pushing", and then waiting to progress more, than not progressing, then doctor telling me, it's a C section now, or wait and most likely a C section later.  You tell me, what choice did I have?  Tell me how my birth plan helped me then?  If anything, I was disappointed.  I was upset because I did not want a C section.  I was upset because I wanted to exclusively breastfeed.  My advice?  Go into it knowing what is ideal for you, but planning only on doing what's best for you and your baby.  Because thinking that it will go exactly how you want it to only sets you up to be upset and nervous when it doesn't.  I still feel disappointment from not being able to provide my baby with only breast milk.  But when I really think about it, why should I?  She's happy and healthy and I'm doing my best.

I still am adjusting to my "new normal" and it hasn't been easy.  My clothes don't fit the same, I often leave the house with a pile of clothes on the bed that I have tried on, but they didn't work.  I'm trying to be patient with myself.  I know that I carried a baby and my body has changed, but it doesn't stop me from being upset sometimes.  I hate to catch a glimpse of my scar in the mirror.  And oh the stretch marks-another gem I get to deal with from having such fair skin.  They will fade hopefully.

People aren't kidding when they tell you, "Having a baby will change your life forever!" That's okay with me.  I wouldn't want to go back.  One of my favorite parts of having Scarlett has been seeing Andrew's interactions with her.  It is the sweetest thing.  He adores her and he's such a good daddy.  I'm truly blessed to have him.

I love how tiny she looks in daddy's arms
I'll leave you with a common scene from our household.  Dexter competing with Scarlett for attention.  He has been very sweet and curious, and sometimes I even think depressed.  He's adjusting though.


Tuesday, January 14, 2014

I can't imagine life without my Dohmie!

This is a sponsored post where I received compensation and was written by me on behalf of Dohmie for Mom it Forward.  All opinions are 100% mine.


dohmie by marpac fry sauce and grits


When I saw that the Mom it Forward network was looking for bloggers to review and write about the Dohmie Serious Sleep Baby Bundle from Marpac that promises your baby will sleep better,  I was all over it! When I received the Dohmie, I liked how the design was simple, clean, and I noticed that it constructed with high quality material.  

 sleep aids for babies fry sauce and grits
The Dohmie creates a natural white noise to help babies fall and stay asleep, the rest of the family to sleep easier and/or carry on with normal lives and activities.  The Dohmie's sound is seamless and continuous because it uses electromechanical technology to create the natural sound of rushing air, unlike other white noise machines that work on a digital loop and cut off after a set period of time.

At the front it has a switch where you can make the noise louder or softer without having to adjust the Dohmie.  The cool thing is by rotating the cap and collar of the Dohme to allow different amounts of air to rush through these openings in different ways, you can create a variety of tones and volumes; therefore you can customize the sound to your babe's liking.

When I received the Dohme, Amelia was 14 months and I thought Amelia didn't have sleep problems, that's what I thought at first.  I decided I was going to give the Dohme a really good try and use it everyday during naps and when she went down for the night to see if I could tell if this little sound machine would make a difference in her sleep.  Within a week, I could tell a significant difference in her sleep patterns and most importantly, the routine of her sleep, and her behavior towards sleep.


One of the things I love about the Dohmie is how it helped establish a stronger routine when it came to going to sleep for Amelia.  Because I turned it on everytime I would put her down to bed, Amelia got into the habit and routine of when the Dohmie goes on, it's time for bed.  Seriously, as soon as I turn on the Dohmie, Amelia would calm down and pretty much pass out in my arms as I put her down to sleep.  I swear the soothing sound the Dohmie makes hypnotizes them.

white noise machine for baby fry sauce and grits

Before using the Dohmie, it was a struggle to put her down.  There would be sessions of crying, screaming, and Amelia trying to climb out of the crib.  I was so used to her acting that way, and it didn't seem out of the normal.  Now, our sleep routine is SO much better.  It has made our lives so much easier because Amelia gets her rest and we do too!  It kills two birds with one stone.  Since I've used the Dohmie, she sleeps longer, she's on a better sleep routine, I feel like she gets the quality sleep she needs to grow, and gives McKay and I the much needed break when she's asleep.

During the holidays we went down to McKay's parents house and slept over Christmas Eve night.  I forgot to bring our Dohmie and the combination of sleeping in a different place, over stimulation from festivities, activities, and family, and not having the Dohmie was a recipe for an awful night of sleep.  She woke up every hour and I was to the point where I wanted to drive back home at 3 am in the morning.  I learned my lesson and now whenever we travel I bring the Dohmie and it helps Amelia to get a the rest she needs.  It's easy to travel with because it's small and lightweight.

I recommend the Dohmie as a baby shower, birthday gift for a parent, or just treat yourself to having better sleep for your little darling and you.

Check out the awesome reviews of this product here.  

For more information about Dohmie and serious sleep, please visit marpac.com.

Also, follow Dohmie on Twitter, Pinterest, and Facebook for all things baby and sleeping!


Thursday, January 9, 2014

Six Money Saving Mama Tips from Rad Mom Cool Kid

Hey, I'm Briton from Rad Mom Cool Kid!  I'm excited to post at Fry Sauce and Grits today and I'm even more excited for Melanie and that darling bundle of babyliciousness in her arms! In celebration, I'm sharing my favorite money saving mama tips!

Money Saving Mama Tips from Rad Mom Cool Kid

ONE: When my husband and I first found out we were expecting we were broke college students. Like we didn't take out student loans and were paying for everything up front kind of BROKE. Our grocery budget was $20 or less per week. Do you know how much a pregnancy test costs? Let's just say that we were able to buy ONE and it was the cheapest one at the grocery store. I think it cost $7. Do you feel stressed for 9 years ago me? What if it was wrong??!! A few years later we were a new kind of money-less. We were out of school but had just bought our first house!! I think we splurged and found a 2-pack pregnancy test for $12 when baby #2 was discovered. Then, I learned the best pregnancy test tip ever... Dollar Tree pregnancy tests are $1 and just as accurate as the ones at the pharmacy. With baby #3 I got a whole handful of them and they were all correct. Crazy right? Stop wasting $ on pricey tests! SAVINGS: about $6 per test

TWO: Target's store brand diapers are super cheap and super reliable. I have tried so many diapers over the years and these are the ones I always go back to. Also, I don't bother with fancy 'night-time' diapers or pull-up training diapers. I buy a size bigger for night-time if they get overnight leaks. With the pull-ups, I just don't see the point! I let my kids pee their pants, they feel how horrible it is, they stop doing it pretty quickly. I kind of feel like pull-ups drag the process on and on. SAVINGS: about $0.06 per diaper

THREE: Don't buy a high chair. They are big and hard to clean. My kids used a Bumbo- style chair with a tray attachment. They went straight from that to a booster with a tray. They are much easier to clean than a bulky high chair and you can take them on the road. SAVINGS: about $140

FOUR: Get the cheap baby monitor. $20 is all you need to get the monitor that will let you know if your kid is having a problem. I guess if you live in a mansion, you might need something stronger but, normal people- you don't need to watch your baby at all times and hear every single inhale and exhale. YOU NEED SLEEP so set up the basic monitor and close your eyes. SAVINGS: about $230 but the sleep is priceless


FIVE: Shop consignment and thrift stores for baby clothes. It doesn't work as well for older kid clothes because they get worn out before they're grown out of. Newborn-12 months is the perfect time to buy 2nd hand- you'll be surprised at how many items still have the original tags even! I always check our local kids consignment shop for tap and ballet shoes and leotards, holiday dresses, and winter gear- I keep the future in mind and buy bigger sizes and store them if they're high quality! SAVINGS: varies, but usually pretty dang great

SIX: Use Oxy Clean and Folex. Oxy Clean + water + stained baby/kid clothes + soaking overnight = brand new clothes. Do this when you unpack clothes for baby # 2 or when you get a bag of hand-me-downs. Even when you put clothes away squeaky clean, old stains will magically show up, but a good soak will fix everything! Folex is a carpet cleaner. It changed my life as a mother. A friend brought it over one morning after I facebook freaked out about hot pink lipstick all over my carpet and a certain white (white!) preschool stuffed animal that was visiting our home. It got it out! Hot pink waxy cheap lipstick out of fake white fur. I'll be a customer for the rest of my days after that. It costs under $10 and you can find it at home improvement stores and maybe Wal-Mart. The bottle will last a long time and you might want to worship me after you use it the first time. SAVINGS- depends on items being saved, but probably a whole bunch

What are your best steals and deals or tricks and tips when it comes to saving money with a baby? Thanks for hanging out with me today! Here are some of my favorite posts about life with little ones: travel with kids: 10 tips for survival becoming a 'yes' mom


Sunday, December 15, 2013

Grits Births A Southern Belle!

We're so happy and thrilled to announce that our sister Melanie, aka "Grits" had her first baby early Sunday morning.  After a very long labor we're happy to say that mommy and baby are doing well!  The babe of Birmingham doesn't have a name quite yet.  We'll keep you posted when the decision is made.  Sending our love and good vibes to Andrew and Melanie in Alabama.  Isn't she beautiful?!  She has red fuzz on her head!


Thursday, October 24, 2013

How to Paint a Glazed Ceramic Lamp Tutorial


I bought this lamp at Target over a year ago for $10 on clearance. I liked the shape and color, but I didn't really know where in my house the deep plum color would work.  And my husband vetoed it in the bedroom because he doesn't like it.  So, it sat in a closet in the guest room.  It turns out you can spray paint over glazed ceramic, and it's pretty simple too.  You just have to follow these steps...


Tuesday, October 15, 2013

DIY Leather Baby Moccasins

A couple weeks ago I was cleaning out my closet and came across an old reddish orange suede skirt I used to wear in high school.  I kept onto this skirt for so long because it's such a classic piece and had a hard time getting rid of it.  I couldn't remember the last time I wore it and tried it on.  I wasn't surprised that it didn't fit.  I was thinking of all of the things I could do with the skirt.  Make a pillow, leather bows for Amelia, and then it came to me!  I could make Amelia some suede moccasins.  Check out how they turned out!

DIY Leather Baby Moccasins from FrySauceandGrits.com


Thursday, September 26, 2013

Nursery update and some pregnancy brain ramblings

It has been a few months since I posted anything about the nursery.  When it comes to decorating, I always have the ideas in my head.  Then when it comes to actually implementing them, it's harder then I thought it would be!  It's overwhelming to undertake a whole room of baby stuff.  We're starting from scratch here!  We don't have any family close to borrow things from, and at times I have been overwhelmed by how much we need to buy!  When you're doing things on a budget, you have to get creative!  See what I've been up to after the jump...

Tuesday, September 10, 2013

"Grits" Comes into Town

Hello!  I hope you all had a great weekend!  I sure did!  My sister Melanie, aka "Grits" came into town this week from Alabama!  I love it when sister comes into town. I love being able to spend everyday with her doing something fun, chatting, and taking it easy.  Normally we talk a lot on the phone or Skype with each other.  It was really good to see her and her little pregnant belly.

We did some fun things, we went to the cute Oh Sweet Sadie Boutique, saw Austenland, ate a lot of baklavas and gyros at the Salt Lake City Greek Festival, toured my town's local Garden Show, and Caitlin and I hosted Melanie a baby shower with all of our family and friends.  Melanie is doing a really cute mermaid theme nursery, so Caitlin and I thought we would host a mermaid theme shower and it turned out really cute.  We had it at my parents backyard.  Check out some of the pictures from this week.


Caitlin riding her bicycle with Maizie.

Monday, August 19, 2013

Angel Food Cake with Strawberry Whipped Cream Frosting Recipe

This weekend, we celebrated a milestone in our lives.  Amelia had her first birthday and we had both sides of the families come over to our house to celebrate this special day with us.  We were surrounded by those we love, good food, and it was the perfect weather for a party.  It was a reminiscent day for me.  I remember a year ago how scared, excited, anxious, and ready I felt to do the whole labor thing.  I've been dreaming of this moment my entire life to meet, hold, and love this little baby.  A year has gone by so fast.

It's a tradition on my dad's side of family to make this a particular cake for birthdays.  I remember seeing pictures of my 92 year old grandma and my dad eating this cake for their birthday as children.  I grew up eating this cake too.  I wanted to keep the tradition alive for Amelia's birthday.  

This cake is a perfect dessert for a birthday or any kind celebration because it's light and not heavy, it's easy to make, and is absolutely delicious. If a cake recipe has been passed down for multiple generations, you know it's that good. 

Angel Food Cake with Strawberry Whipped Cream Frosting from FrySauceandGrits.com

Wednesday, June 19, 2013

Six Easy Embellished Onesie Designs

6 DIY Embellished Baby Onesies from FrySauceandGrits.com
One morning a while back, I was doing my daily morning routine of getting Amelia and I ready.  As I was going through her closet to decide what she was going to wear that day, I started to feel that I had nothing for her to wear (I feel this way all the time in my closet).  She had plenty of clothes to choose from but I was feeling bored of them.  I had received a handful of onesies as baby shower gifts and even though onesies are practical and great to dress your baby in, they can be boring and downright ugly.  I hated how most of the onesies I owned had stupid stitched characters like monkeys and bears on them.  I didn't want to go spend extra money on clothes for her.  So a light bulb went off in my head.  I thought to myself, "Why don't I embellish and cover up the ugly parts of the onesies to make them cute!" 

 To start, I looked for inspiration. I got online and checked out some of my favorite stores that I can't afford (Anthropologie, J Crew, Nordstrom) and then my last stop is the mother load of inspiration, Pinterest.   This helped the creative juices flow.  Whenever I start a new project, I always scavenge the house to see what supplies I already have so I don't have to spend extra money.  I had a bag of old clothes I was going to donate to the Salvation Army, and I decided to take one extra look through them to make sure there wasn't items I wanted to keep.  To my surprise I found a couple of items that had some amazing textures and patterns on it and thought they would look awesome on Amelia's onesies.

Blue Lace Bow Onesie

DIY Bow Baby Onesie from FrySauceandGrits.com

This onesie is one of my favorites because of the fabric I used on it.  Get this, I had some old lingerie that had seen better days (wink, wink) and it was made from this blue stretch lace.  I loved the texture and color of the lace, so that's when I decided I would make a big bow in the front of the onesie to cover up the, "Daddy's little girl" wording in the center. To make this onesie I first cut two six inch strips out of the cups (the bust part of the lingerie top) pinned them to the edge of the sleeve and sewn over it.  Easy.  For the bow I took the midsection (make sure you have both seams on the sides intact to make it easier) of the lingerie top and folded it back and forth like an accordion.  I squished the middle and tied some thread around it to keep it secure.  I used a cream and gold stripped piece of fabric from an old dress and hot glued it around the middle to make the bow.  To attach the bow I pinned it in the center of the onesie to cover up the words.   Then took some matching thread and hand sewn the outline of the bow to the onesie.   

Cream Doily Onesie

Lace Doily Baby Onesie from FrySauceandGrits.com

My great-great-grandmother was known for her lace and crochet work.  I actually own a couple of pieces in my home and WOW, what a piece of art they are!  Well I didn't want to use one of old granny's antique doilies so I went to Joann's and purchased this cream one for .99 cents!  I cut a circle out of cream fabric that I already had, put the doily on top of the fabric, pinned both the fabric and doily it to the center of the onesie (to cover up the not so cute looking flowers), used my sewing machine with cream thread and sewn a small circle in the middle and a large circle towards the edge to secure it to the onesie.  To make this even more unique, add some color or textured fabric behind the doily! 

Lace Bib Onesie

Lace Baby Onesie from FrySauceandGrits.com

To make a this Lace Bib Onesie, I took an old brown lace shirt and cut two six inch strips from the lacy trim (there was two different type of trims on this shirt).  I cut a 12 inch piece of that cream and gold stripped fabric I had from an old dress.  On the cream and gold fabric, I sewn a long length stitch at the top of the fabric and then ruched the fabric to make it look gathered.  I layered each layer on top of each other to give it a waterfall effect.  I pinned them to the onesie and sewn across each layer at the top.   

Green Flower Onesie

DIY Fabric Baby Onesie from FrySauceandGrits.com

I got the inspiration for this Green Flower Onesie from a very expensive Anthropologie shirt I saw a couple months back (I still wish to this day I would have gotten it).  This was one of the easiest onesies to make.  I used an old green ribbed tank top as the fabric for my flowers because I knew it wasn't going to fray.  To make the flowers I free handed it and cut out different sizes of flowers: large, medium and small.  The less perfect, the better. I then layered them on top of each other (2 flowers per flower) and arranged them in a random sequence on the onesie.  I pinned them to the onesie and hand sewn them on with matching green thread.  To get a "curling" effect, just sew the flower petals to the onesie.  Learn how to make Amelia's bow headband here.

Victorian Cameo Onesie

Victorian Cameo Onesie from FrySauceandGrits.com

I always loved the look of Victorian Cameos.  My grandma had a cameo pin she would wear all the time, this onesie reminds me of her and how classy she is.  To make the cameo, I used two different colors of felt  for the oval and for the lady.  Draw a medium size oval on one color of felt and cut it out.  For the cameo, I looked at cameos on the internet and hand draw it onto a different colored felt and cut it out. Super glue the lady to the center of the oval.  For the lace fringe behind the oval, I used up more fringe from that lace brown shirt I used in the Lace Bib Onesie.  I cut out a 12 inch section of lace and hot glued it to the back of the oval.  For the cute cheetah print bow, I used an earring who had lost it's mate, so I ripped the bow off the earring and hot glued it to the lady.  Once I was done with all that, I made sure the cameo was centered onto the onesie, and hot glued the entire cameo on the shirt.  For the fringe on the sleeves, I took two six inch strips of lace fringe from the brown lace shirt I used in the Lace Bib Onesie, pinned it to the the edge of the sleeve, and sewn it on there.  BTW, the cute headband Amelia is wearing is from Cozette Couture.  

Draped Metallic Bib Onesie

DIY Bibb Baby Onesie from FrySauceandGrits.com

This white onesie was almost thrown out a couple times.  When I had Amelia I thought I knew how to do laundry and get rid of stains, well let's just say a lot of Amelia's clothes were ruined because I was so ignorant when it came to getting formula, poop, and other bodily fluid stains out of her clothes.  FYI, I've gotten a lot better with getting stains out of clothes.  This onesie had disgusting yellow stains all over the front.  Amelia looked pretty ghetto whenever she wore this poor onesie.  I got the idea to drape the stains with a piece of an old metallic shirt I used to wear.  I cut out a 6" X 12" rectangle piece out of this metallic shirt.  I used my sewing machine to sew a long length stitch at the top of it.  To get the gathered look, I then ruched it, pinned it to the onesie, and sewn over it!  Now no one know there's nasty stains because they're hiding behind the bib.  

I hope you enjoyed reading how I designed these onesies.  I feel that having a stylish baby doesn't have to come at a premium price, it just takes some extra time and some creativity.  Hopefully this has inspired you to create new things out of old things. 

I was featured on My Craft Channel where I demonstrated how I created the onesies. Check out the video here!

Also, check out my Studio 5 debut below! 

Wednesday, June 12, 2013

7 Easy Baby Headbands

DIY Baby Headbands from FrySauceandGrits.com
I'm always looking for ways to use scraps of  fabric, old clothing, and embellishments I have laying around the house into my projects.  One night last week, I couldn't shut off my overstimulated mind, so instead of laying in bed for hours, I decided I was going to get up and do something.  I got this creative burst of energy at 1:00 a.m. and went downstairs to my "creative" room and created seven headbands for Amelia.  I felt so productive and as soon as I was done, I went upstairs and was able to go back to sleep!  Creating things, help my mind to calm down.  FYI, these were all easy and I was able to make them all within a hour.  

Flower baby headband from FrySauceandGrits.com

To make this headband was so EASY!  For this flower headband I purchased a white baby satin stretch trim, you can get this at Joann's Fabric (if you have a 50% coupon, it makes it really cheap).  The plastic flowers are from Pick Your Plum.  I measure the headband so it will fit her head.  I used this as a guide for the length of the stretch trim:

Infant and Baby Headbands Size Chart
You may also provide your head measurement for a perfect fit!  
  • Newborn (12 inches)
  • 0-6 Months (13 inches)
  • 6-12 Months (14 inches)
  • 12-18 Months (15 inches)
  • 18-24 Months (16 inches)
  • 2-3 Years (17 inches)
  • 4-5 Years (17 inches)
  • Older (18 inches)
 Once I cut the trim, I hot glued it together.  Then to finish it, I added each tiny plastic flower to the headband in a random sequence.  Five minutes later I was done!  Done in a SNAP!   

Baby Glam Headband from FrySauceandGrits.com

I had a couple of thick headbands I bought many years ago for me and never liked them because they were too tight on my head :(  I got fed up with storing them in my bathroom and I was just about to throw them away, when I had the idea to use them for Amelia!  A couple months ago, I made a DIY Glitter Peter Pan Collar on a shirt and let's just stay it was a disaster.  Instead of throwing away the shirt, I cut the glittered collar off the shirt, and cut leaf shapes out of it and layered them (with hot glue) on the headband to get this fan effect.  

If you don't have a glitter Peter Pan collar, to make a glitter fabric you'll need to get some permanent fabric glue.  I used a foam brush to brush the glue evenly on the fabric.  I used a generous amount of glue on the fabric and poured a lot of glitter on top of it.  Press glitter into glue and let it dry overnight and violia!    

DIY Fabric bow headband from FrySauceandGrits.com

This headband took the most time, which was 10 minutes!  I found this awesome no sew tutorial on how to make the bow.  I got the fabric from Riley Blake Designs.  Once I made the bow, I glued it to the headband.  

Baby bow headband from FrySauceandGrits.com

This headband was also incredibly easy.  I cut a piece of gold striped fabric, took the headband and squished it together to get the gathered look.  Hot glued the gathered part together on the headband and wrapped the stripped fabric around it and hot glued it in the back to secure it and tada!  

Felt baby headband from FrySauceandGrits.com

This year I made a felt heart garland where it hung across our mantel in our family room.  I had some left over hearts, I took colored thread and sewed a colorful border around the shape of the heart.  I made three of these in different colors and sizes and hot glued them to the headband.  

Stylish Baby Headband from FrySauceandGrits.com

This is one of my favorites.  I got a scrap of fun Art Deco fabric from Modern Yardage and cut out a piece of it, hot glued it to some white felt that was cut to the shape of the fabric, and hot glued it to the headband.  

Easy baby headband ideas from FrySauceandGrits.com

I cut a piece of an old white embroidered skirt I used to wear ages ago and pinched the bottom of the fabric  together to make the gather and hot glued it together.  I took a piece of chartreuse green wool and wrapped the base of the gather and glued it in the back to secure it.  Then I glued the entire thing onto the headband.  

I hope you enjoy making these headbands as much as I did. Let's hope you don't have to make them at 1:00 a.m., but if you do, more power to you!  

Monday, June 10, 2013

Big Announcement!

I have something I have been meaning to tell you...


Andrew and I are expecting a baby, due December 12th!

Yes, Dexter, it's true!


The week I found out I was expecting, I had taken a pregnancy test on Friday, and it was negative.  So, the weekend went by and Monday came--nothing.

Andrew and I had the day off together and we were running some errands around town.  We happened to be right next to a Dollar Tree, and so I told him to pull over, I was going to run in and grab another test.  A coworker of mine had told me once that she only bought the dollar store pregnancy tests because they worked just as well.  And, if you've been to buy a test at the regular grocery store lately, they run around $8 a piece.  So, I ran in and bought 3 tests.

We didn't get home until later that afternoon.  I took the first test, and it was a little harder to read, but i was pretty sure it was positive.  But, then I didn't really trust it either because it was a dollar store test.

So...I took all three tests.  Positive. Positive. Positive.

Then, I made Andrew drive with me to Target to buy a "real" one.  Took that one too, positive.


Two of the dollar store tests next to the other "real" one I took.

Now you can learn from my experience, the dollar store tests are legit!

The second and third month of pregnancy I fought all day nausea.  I hate the term "morning sickness" because it doesn't just happen in the morning folks!  I was eating Saltines and sipping ginger ale nonstop.

But, the past few weeks have been better.  And, I even got to have another ultrasound last week and this time it looked like a REAL baby! The first one they did at 8 weeks the baby looked more like a blob.

We are so excited to start our family, we have been trying for a baby for some time now.  I'm sure I will need all of your baby/new mama advice, so bring it on!


Related Posts Plugin for WordPress, Blogger...